Purpose
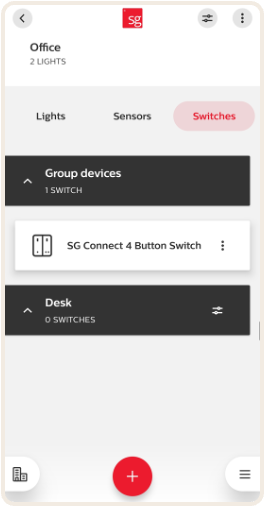
The Connect switch can be added to a group or zone to provide simple
and manual light control. The switch's functions depend on which version you choose to use:
→ 2-button switch: On/off and dimming up/down.
→ 4-button switch: On/Off and dimming up/down on the left side,
and two configurable scenes on the right side.

How to add switches
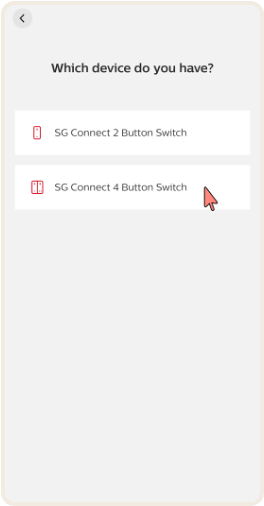
1. Click on "+" in the group screen and select "Switch".
2. Select the type of switch you want to add (2-button or 4-button).
3. Specify whether you want to add the switch to the entire group or a specific zone.
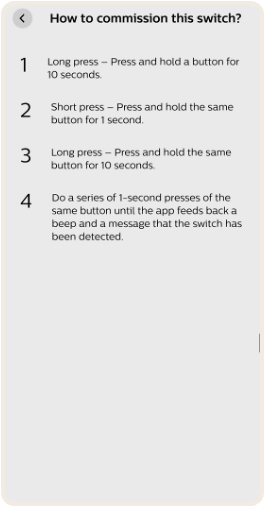
4. Follow the app's instructions for commissioning the switch.
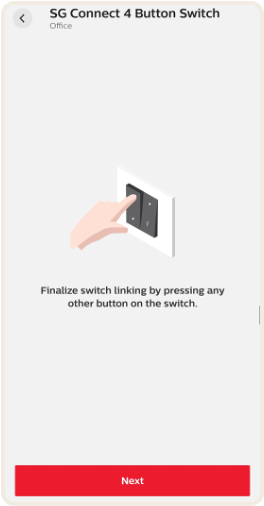
5. Once the switch is configured, the app will ask you to test its functionality:
→ If the switch is working as expected, confirm by pressing "All is well".
→ If the switch does not work, read "Notes and tips" and try again.
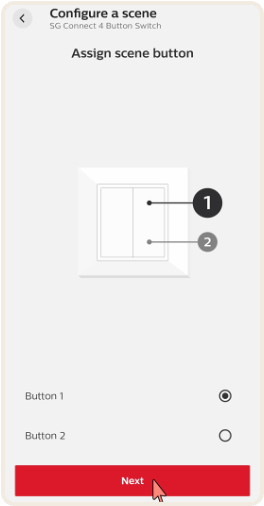
6. For 4-button switches, you can assign and customise scenes in the next step.
Step-by-step guide
Step 1
Click on "+" in the group screen and select "Switch".

Step 2
Click on "+" in the group screen and select "Switch".

Step 3
Click on "+" in the group screen and select "Switch".

Step 4
Select the type of switch you want to add (2-button or 4-button).
Step 5
Specify whether you want to add the switch to the entire group or a specific zone.

Step 6
Follow the app's instructions for commissioning the switch.
Step 7
Once the switch is configured, the app will ask you to test its functionality:
If the switch is working as expected, confirm by pressing "All is well".
If the switch does not work, read "Notes and tips" and try again.
Step 8
Once the switch is configured, the app will ask you to test its functionality:
If the switch is working as expected, confirm by pressing "All is well".
If the switch does not work, read "Notes and tips" and try again.

Step 9
Once the switch is configured, the app will ask you to test its functionality:
If the switch is working as expected, confirm by pressing "All is well".
If the switch does not work, read "Notes and tips" and try again.

Step 10
For 4-button switches, you can assign and customise scenes in the next step.

Add switches - configuring scenes
Purpose of the programme
With the 4-button switch, you can save and control two lighting scenes.
Scenes allow you to set predefined light levels for groups/zones or individually.
How to configure scenes
1. Select "Assign a scene" at the end of programming or from the switch
overview afterwards.
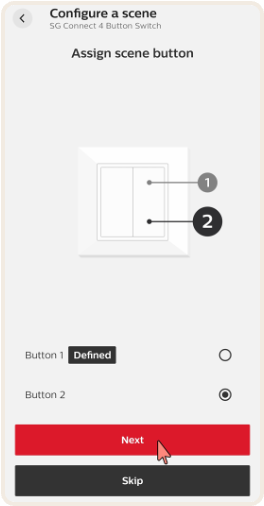
2. Select the button that will control the current scene.
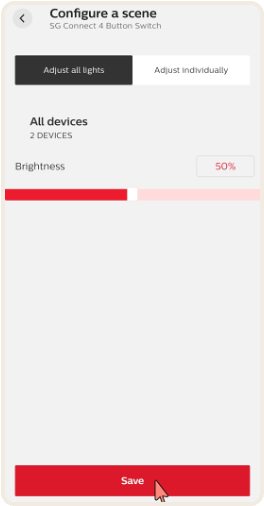
3. Set light levels:
→ You can adjust the light levels for each luminaire individually or
set the same level for all.
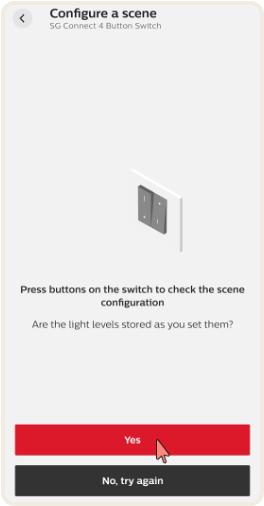
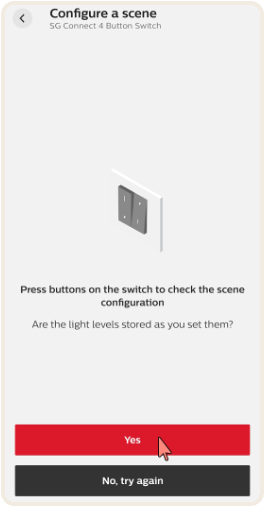
4. Test the scene by pressing the selected button on the switch.
5. Repeat the process to configure the second scene.
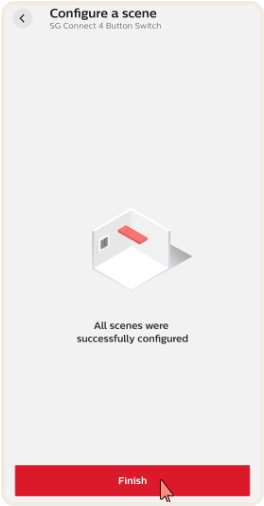
6. When everything is ready, press "Finish".
Step-by-step guide
Step 1
Select "Assign a scene" at the end of programming or from the switch overview afterwards.

Step 2
Select the button that will control the current scene.
Step 3
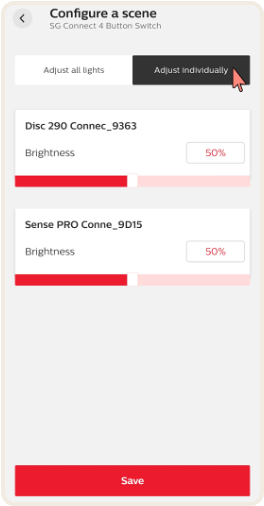
Set light levels:
You can adjust the light levels for each luminaire individually or set the same level for all.

Step 4
Set light levels:
You can adjust the light levels for each luminaire individually or set the same level for all.
Step 5
Set light levels:
You can adjust the light levels for each luminaire individually or set the same level for all.
Step 6
Test the scene by pressing the selected button on the switch.
Step 7
Repeat the process to configure the second scene.
Step 8
Repeat the process to configure the second scene.

Step 9
Repeat the process to configure the second scene.
Step 10
Repeat the process to configure the second scene.
Step 11
When everything is ready, press "Finish".
Step 12
When everything is ready, press "Finish".
Notes & tips
→ Follow the instructions carefully. Pay attention to button
presses and times to avoid errors.
→ At point 4, you may have to repeat the 2-second press up
to 16 times for the switch to be detected.
→ Add all the luminaires in a group before adding the switch.
→ Group or zone? The switch can be connected to either a
group or a zone, not both at the same time.
Recommendations
→ If there are switches in both group and zone, the following
criteria apply:
- Add the group switch first.
- Only use 2-button switches for group control.
- In zones, you can use 4-button switches with scene settings.
Restrictions
→ Max 20 luminaires per zone when a 4-button switch is used with
multiple zones.
→ If the switch is not detected during setup, try again.
Installation
→ Make sure that the switch is mounted correctly:
- The switch module under the rocker/tilts is labelled with
"O" and "I": it is important that "I" is at the top.
- For 2-button switches: Make sure the rocker switch is not
upside down as this will affect functionality.